
Wedding Save the Dates
Adrian Save the Date
You said, “Yes!” and now it is time to start organizing yourself as your wedding approaches. Let’s be real: This is an overwhelming period, and there is just so much to do. Your seemingly endless list of tasks includes your wedding invitation and all that comes with your stationery. But there is so much more to your wedding invitation set than the invite alone.
In this guide, we will show couples everything they need to know about building a wedding invitation set. With the help of your partner and the experts at Bliss & Bone, you can find a variety of wedding invitation set templates that will perfectly match your wedding attire, decor and more. There is so much to celebrate right now, and these digital and paper goods serve as the most beautiful connection to it all. Read on for all of the details required for couples mapping out their wedding invitation sets.
A wedding invitation set, also referred to as a stationery suite, is a collection of paper or digital pieces that contribute to your upcoming celebration. By our definition, a wedding invitation set comprises every notification guests will receive pertaining to your wedding and any other related event. There are quite a few steps involved here and wedding invitation sets often include the following:
Wedding website: Your digital hub of information, this is a website that will contain almost everything guests need to know about your wedding. You can upload photos, a frequently asked questions (FAQ) page and more. Couples love how convenient it is to make wedding invitation sets with RSVP wedding websites as well.
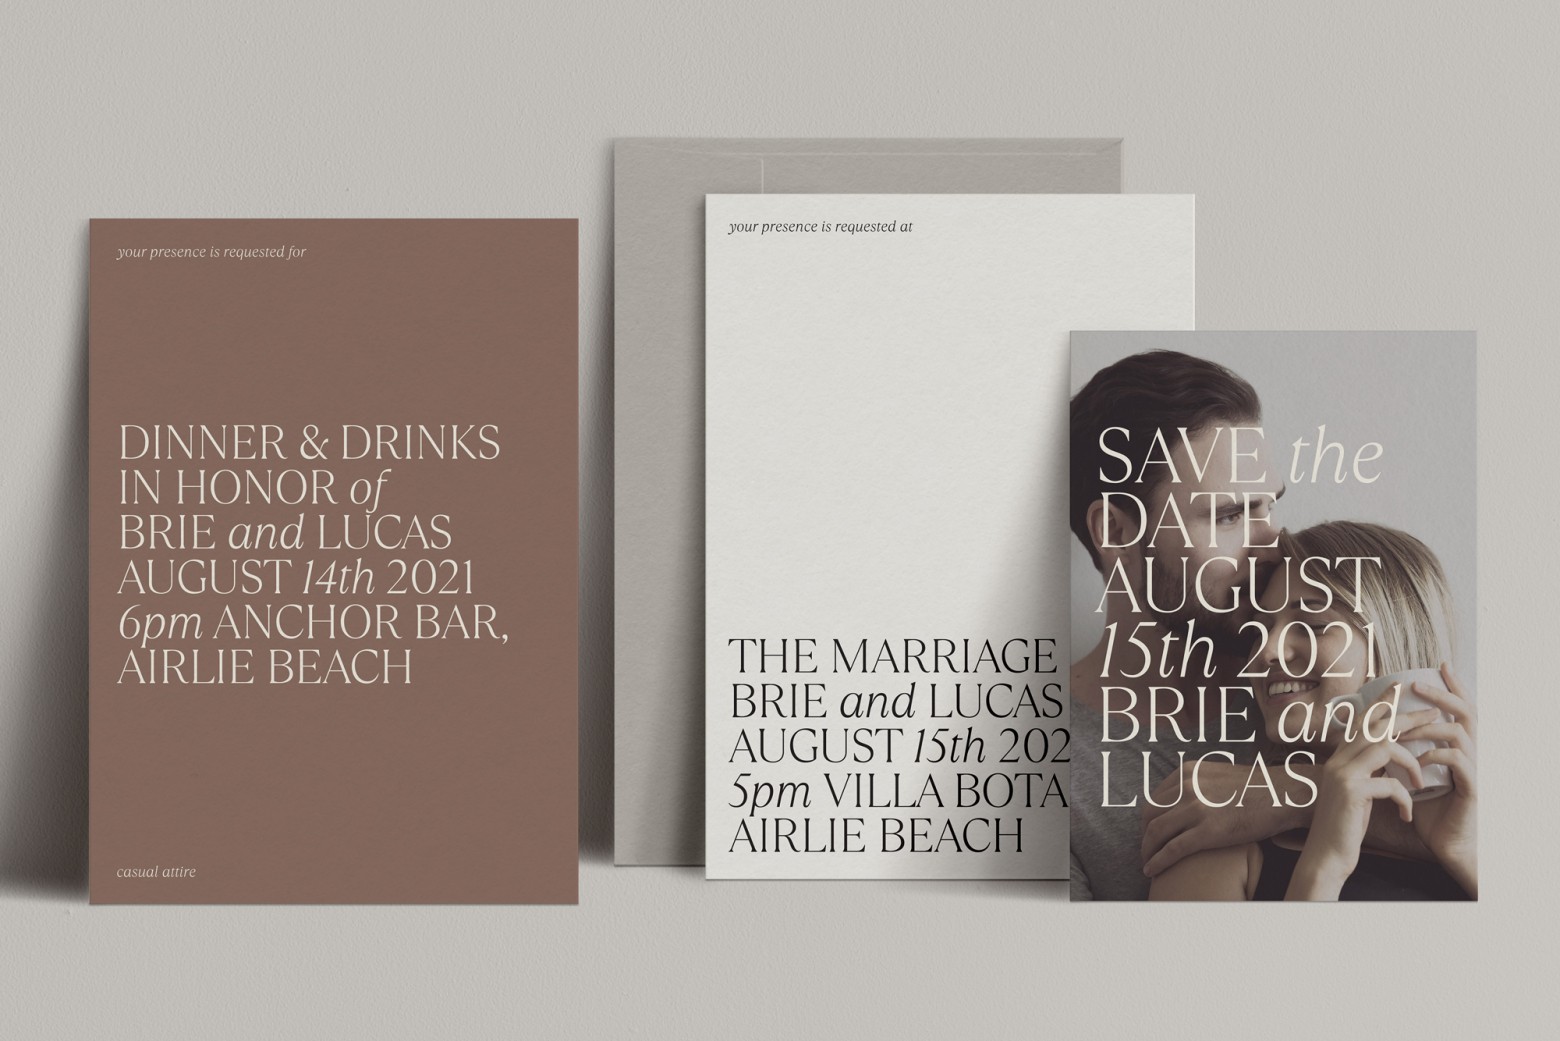
Save the Dates: Online or digital, your Save the Dates is the first thing your guests will receive in their email inboxes or mailboxes. In most cases, couples only share the date and city where they are planning to get married. For added convenience, you can also connect your wedding website to your Save the Date or provide a link on your printed invite.
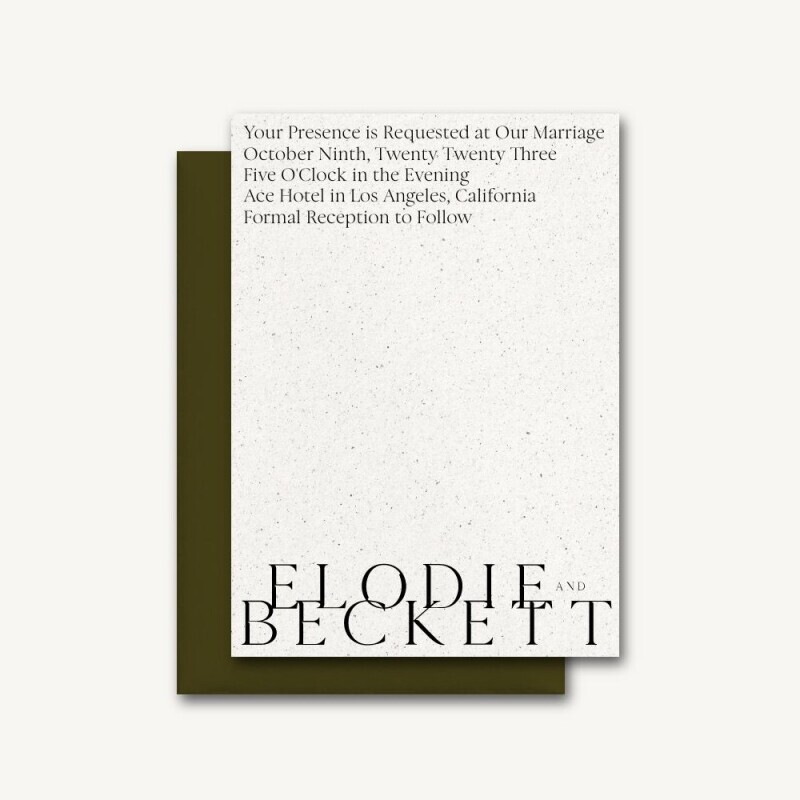
Wedding invitations: These are the formal notification guests will receive after your Save the Date is sent out. Just like Save the Dates, you can make these digital or printed. The text of the wedding invitations will be more detailed and formal, and you will include the time, venue name, reception details, requested attire and RSVP information. If you are sending out printed wedding invitations, you might also include insert cards about pre- or post-wedding events, RSVPs and anything else you need.
Rehearsal dinner invitations: Your rehearsal dinner invitations are sent out prior to your rehearsal. The rehearsal is typically held the day before your wedding, and while it is traditional for the groom’s parents to host, you can consider it part of your wedding invitation set.
Wedding menus: The one part of wedding invitation sets that have to be printed are the menus. These are the cards displayed on reception tables at every seat. They include the course number and details about every one that will be served during the reception.
These are all of the components of our stationery collections, which you can find at Bliss & Bone. With print and digital templates all available for purchase online, there are so many items to choose from based on your other wedding design decisions.
You do not need to complete every piece of this puzzle in one phase. If you follow along an organized wedding timeline, you can stay on track with your process and take your time. As you build out your wedding invitation set, keep these important steps in mind. This is a breakdown of the elements that apply to wedding invitation sets, so you will also need to complete other tasks related to decor, attire and anything else on your list.
Finalize your budget. Schedule a meeting with your partner and any other “stakeholders,” or friends and family members who have offered to contribute financially to your celebration. Understand the percentages of your budget that every vendor will make up. For instance, expensive or affordable wedding invitation sets should account for about 3 percent of your overall budget. Make sure everyone involved in the payment process is on the same page before moving forward to hire your vendors and book your venue. As an example, more affordable wedding invitation sets will be mostly digital, since you will save money and paper.
Consult with an expert. If you want a trained professional on your team, consider hiring a wedding planner. These trusted pros come with years of experience in the industry, and with that, they have a lot of connections about opinions about event planning. From decor and design decisions to organization, this is an expense that is worthwhile for many wedding couples.
Determine your guest count. Who do you see as “musts” for your wedding invite list? Your guests will include family, friends, coworkers and any other important people in your lives. Before you can make final decisions about vendors and venues, you need to know an estimate of how many people you expect will attend your wedding. Generally speaking, about 70 to 85 percent of invited guests will say “yes” to your big day. Remember this figure as you start writing down the people you cannot get married without. If anyone else is contributing to the day, like family or friends, you might also want to see if they have any special guests they would like to invite.
Explore venues in your area and book your favorite. Think about whether you would like to get married in your or your partner’s hometown, your current city or a faraway locale. Based on your budget and personal preferences, there are many venues in areas all over the world. If possible, try and schedule a time to visit your top choices before confirming. And if the venue you love most works with your budget and has your dream date, put down a deposit at your earliest convenience. There is such high demand for all things related to weddings these days, so you do not want to hesitate when it comes to the all-important venue.
Design your wedding website. Your information hub should include anything your guests need to know. This may include, but is certainly not limited to, photos of you and your partner, an FAQ page, recommendations for travel and lodging and more. You should complete this step prior to sending out your Save the Dates
Customize your Save the Dates. Save the Dates should be sent out six to eight months prior to your wedding—if not earlier. If you are planning a destination wedding, it is a good idea to send them out a year or more ahead of time. Your guests need time to make arrangements for work, daycare, petcare and anything else going on in their lives.
Create your wedding invitations. After sending out your Save the Dates, you need to provide guests with a little more information—and ask them whether they can actually make it to your celebration. A crucial part of any wedding invitation set, your invites are the formal items guests will receive and they should be sent out six to eight weeks before you head down the aisle. In your invitations, you should also ask that guests send their responses two to three weeks before the celebration begins.
Craft your rehearsal dinner invitations. While the host of the event may want to weigh in on decisions here, you can also participate in designing the rehearsal dinner invitations. These are typically sent out to immediate family members and your wedding party about four to six weeks before the wedding. They do not necessarily need to match the rest of your wedding invitation set, but it could be a perfectly cohesive addition to your collection.
Work with your catering company on a wedding menu. You and your partner can speak with your venue about catering options, and you might even be able to schedule a tasting. Other venues may require that you hire an outside caterer to come in and provide food for you and your guests. These caterers can also provide a tasting, and some may want to schedule this shortly before your wedding to ensure that all the food used is in season. When you have finalized your menu, you can design your own online.
Receive information from wedding invitation sets with RSVP. By two weeks prior to the wedding, you want to confirm your guest count. Hopefully, everyone will have responded by this point, but you and your partner may need to do some outreach to confirm the final guest list.
Organize your final guest list and make seating arrangements. When you have the guest count confirmed, you can start mapping out where everyone will sit during the reception. You can choose to group people by table and let them pick their specific seats, or you can have specific seating assignments.
These are all of the stationery must-haves to follow and complete as you plan out your wedding invitation sets. Try to stay as organized as possible during this sometimes-chaotic time and do not forget to enjoy your experience as an engaged couple.
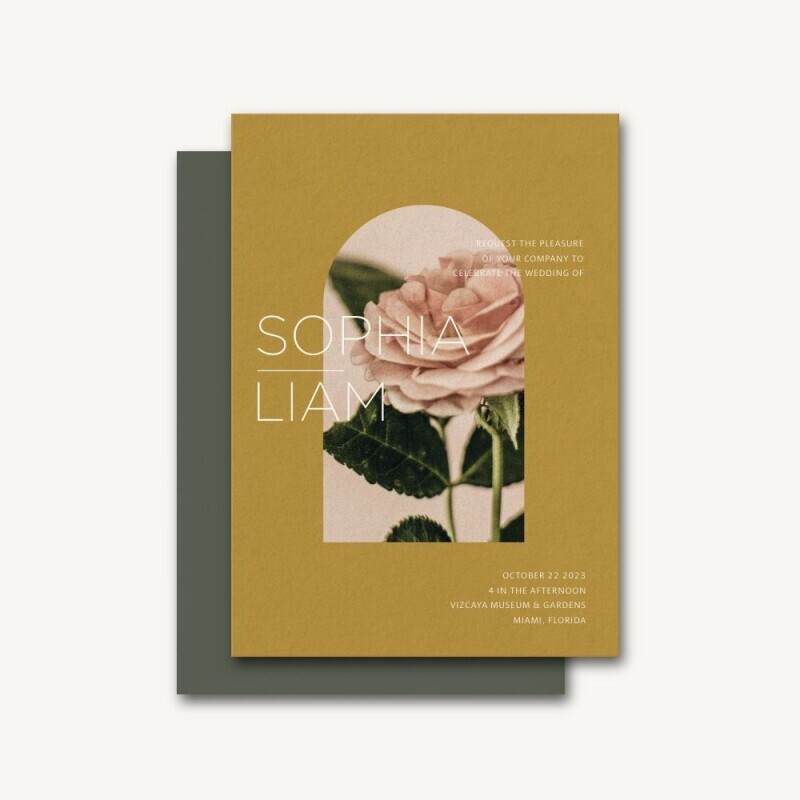
There is inspiration all around you, and sometimes, there are too many beautiful ideas to choose from. As you review different wedding invitation set templates, it helps to narrow it all down. We have a few ideas that you can derive from different aspects of your wedding day. These include:
Your venue: Does your venue feature pops of forest green? Is it in the middle of a big city? Does it have a garden with gorgeous pink blooms? Look around where you are getting married and see if there are colors or iconography that you can use for your wedding invitation set.
Your color palette: You might choose a color seen at your venue, or you could just love a certain combination of hues. Either way, you can easily weave your favorite colors into wedding invitation sets.
Your rings: When you get engaged, you typically determine whether you are a gold, silver or platinum person. If you want to add your favorite metallic to your wedding invitation set, you can level up with metallic foil in your printed or online stationery.
Your decor: Your design decisions can also inform how you customize your wedding invitation set. For example, if you are hosting a boho-style wedding, you may want your invitations to match decor items like pampas grass.
Your social media: Pinterest and Instagram are two incredibly popular platforms to find wedding ideas. You can look up anything from wedding color palettes to invitation designs, and there is a never-ending supply of content for you to explore.
There is practically no shortage of inspiration for your upcoming celebration. By factoring these aspects of your big day into your decision, we hope you feel more ready to design your own wedding invitation sets.
Now that you know about the places where you can find inspiration, we can review wedding invitation set templates. All of these collections can fall into certain categories, but they are all different, beautiful and unique.
From Save the Dates to wedding menus, these are the most popular collection ideas for couples planning their celebrations:
These are only a handful of the many affordable wedding invitation sets you can explore at Bliss & Bone. There is everything from modern and chic to colorful and decorative, and most come with all of the components you need for the perfect wedding invitation set.
Looking for another way to completely customize wedding invitation sets online? You have the opportunity to work with designers to craft a unique logo or monogram at Bliss & Bone. These usually come with your and your partner’s names or initials, and as an added bonus, you can incorporate other details like your date, venue name and even a sweet graphic design. You can then use your design on your wedding website, Save Date and any other piece of your wedding invitation set.
Here is what the design process looks like for couples interested in ordering a logo or monogram for their wedding invitation sets online:
Make your purchase. You can review a slew of design ideas online, and then click on your favorite one. Then, you will be prompted to input your specific text.
Review your logo or monogram. A designer will work on your logo or monogram for about two business days. When it is complete, you will see it under the “My Logos” section in your Bliss & Bone account.
Approve your logo or monogram. If you give your designer the “OK,” you will get immediate access to uploading your logo or monogram on Bliss & Bone projects. Or, for even more freedom beyond your wedding invitation set, you can purchase a print-ready file that you can use elsewhere. You also have one revision with your purchase, so you can always work with your designer to tweak everything. All additional revisions will cost an extra $40.
Upload your logo or monogram, well, everywhere. Start adding it to wedding invitation sets online immediately. Plus, see how you can incorporate them into other parts of your celebration, like a wedding sign, place cards, cocktail napkins and much more.
If you want to use your logo or monogram on Bliss & Bone’s site only, that will cost $40. To use it on other projects, it is $80, or you can pay to use it everywhere for $120. These are among the most unique methods couples use to make even the most affordable wedding invitation sets truly one-of-a-kind.
As we mentioned, your wedding invitation set should make up about 3 percent of your budget. So, what does that mean for you and your partner, exactly? To better understand how much you should prepare to spend on your wedding invitation set, we need to look at a few of the averages that we know about in the industry.
Cost of Wedding Websites
Most wedding websites cost between $50 and $200 per year. You will need it for a while, so it is important to purchase it month-by-month or for a year or more. You will also want to determine whether you want to purchase a unique URL, which you can do from sites like GoDaddy.com.
At Bliss & Bone, you can try out a wedding website for seven days for free. We do not ask for your payment information, and only encourage you to explore all that you can achieve with our wedding invitation sets online. After you are done with your free trial, you can choose between a standard or premium subscription. The Standard option is $12 per month, and Premium is $18 per month—a slightly higher price for a few bonus features. You can also upgrade, downgrade or cancel your subscription at any time.
Cost of Save the Dates, Wedding Invitations and Rehearsal Dinner Invitations
For the most affordable wedding invitation sets in a printed style, you will want to explore digital printing. This type is $700 to $1,200 for a set of 100 invitations. And when you add in premium features like embossing, engraving, offset printing, letterpress or metallic foil, prices will instantly go up. At Bliss & Bone, our most affordable wedding invitation sets start at $257.50 for 25 A7 (5 x 7-inch), one-ply cards for formal printed invitations. And similarly, prices go up for our letterpress or metallic foil offerings. With Bliss & Bone’s online builder, you can review the real time pricing changes as you make decisions for wedding invitation sets. For Save the Dates, costs start at $235 for 25 A6 (4.5 x 6.25-inch), one-ply cards.
By far, the most affordable wedding invitation sets are digital. Sent through to your invited guests’ emails, these are a much more cost-effective, paper-saving route. For some items in your wedding invitation set, like your wedding menu, you will need paper. But for items like your Save the Dates and invitations, you can save a significant amount by choosing among these affordable wedding invitation sets. Most commonly, Save the Dates and wedding invites run about $1 per invitation. If you design your wedding invitation set at Bliss & Bone, digital Save the Dates and invitations start at $1.20 for one to nine recipients, or $0.90 for 10 or more.
Cost of Wedding Menus
Our wedding menu designs are printed on No.10 (3.875 x 9.25-inch) one-ply cards. They start at $257.50 for 25 menus, and costs go up for letterpress and metallic foil add-ons.
And do not forget: You will also want to factor in the cost of an optional logo or monogram if you are interested in adding that to your order. As we previously mentioned, those will cost anywhere from $40 to $120 extra for your wedding invitation set.
Once you have narrowed down the wedding invitation set design you love most, you can personalize it with your specific details and put your own twist on the original templates. As you build out your wedding website, Save the Date, wedding invitation, rehearsal dinner invitation and wedding menu, these are the rules to follow for your wedding invitation set:
Building Out Your Wedding Website
Explore the many options available and click on your favorite one. From there, you can sign up for your seven day trial or commit to one of the subscription options: standard or premium. If you go with the latter, click “Start Subscription.”
Create your URL. You can use one of our programmed URLs or purchase a totally original one on a third-party site like GoDaddy.com. Setting your URL will activate your site.
Review all of the features available. Check out the offerings available to you, and test out the different page templates. You can make changes to existing pages on the template you choose, or add a new page and customize it to your liking.
Building Your Digital Save the Dates and Wedding Invitations
If you want to send your Save the Dates and wedding invites through to your guests’ emails, you can follow the same steps to build them.
Check out the different templates and pick the best one. If you are ready to get going, click “Customize.” This will take you directly to the online builder.
Change the background or texture of the digital card. You can leave the design as is, or try out different background ideas and textures. If you look over to the right of your screen, all of your changes will show up in the “Preview.” When you are ready for the next step, click on the square below the initial tab you were working in.
Switch up the background of the design. All of these digital invitations appear as a flat-lay, so you can change the background that is displayed behind your card. If you are done, click on the “A” tab.
Make changes to the text and font appearance. You can adjust the text size, letter spacing, color, alignment and font on your digital Save the Dates and invitations. Plus, you can even add a text box by clicking on the “+” sign just below the alignment options. To go to the next phase, click on the paintbrush.
Add a border, drop shadow or shadow overlay. This is the section that adds dimension to your guests’ screens. Try out the many selections available before moving on by clicking the icon with several shapes on it.
Move or add in objects, illustrations and graphics. Add even more interest to your Save the Date or invites by bringing in flowers, leaves and other objects, illustrations and graphics. These contribute to the dimensional appearance of your invites, and they are yet another way to customize your project. If you want to add a logo, click on the tab with the “&.”
Upload a logo. You can pull your designed logo or monogram from your account in this section. Plus, you can move it around to wherever you would like on your invitation preview. If you are happy with your design, click “Next.”
Share details for your email. This is the email that will be sent along with your digital invite. You can keep it simple for a Save the Date, but you will want to feature more context like timing in your invitation. Then, click “Next.”
Customize the Event Page. This is more commonly set up for invitations, not your Save the Date. Here, you can collect RSVPs and addresses, write a note, add an interactive map and much more. To move forward, click “Next.”
Pull in your guests’ information. In the “Recipients” section, upload your guests names, emails and the number of guests invited within every party. When all of the information here is confirmed (make sure to double check!), click “Next.”
Input your payment information and send. All you need to do here is pay, send and prepare for the RSVPs to roll in!
Building Your Printed Save the Dates and Invitations
Select your go-to template and click on it. Then select “Customize + Price.” This will take you to a builder that is similar to the digital one. Keep your eye on the top right hand corner, as it will show the cost of your wedding invitation set in real time.
Edit the card quality, size and more. The first step is choosing the number of invites you need and the type of paper you want. Then, click on the “Aa” tab.
Make changes to the text. Similar to the digital invites, you can update anything related to the text in this section, and you can see your changes in the preview to the right of your screen. Next, click on the envelope tab.
Input your envelope preferences. Building your printed wedding invitation set diverges when you need to add envelopes to your order. Change the quantity, paper type and more in this section, and then click on the paintbrush tool when you are done.
Opt in or out of edge paint. This is essentially where you decide if you want a border. If you do, toggle it on and then select the color. If you are good to go, click on the tab with several shapes on it.
Add objects, illustrations and graphics. Just like the digital builder, you can bring more to your paper wedding invitation set with these unique designs. From there, click on the “&” tab.
Upload your logo. Here, you have the option to select and place your custom logo or monogram.
Review your costs. You can click on the “$” to see a full breakdown of the cost of this part of your wedding invitation set. When everything looks okay to you, click “Next.”
Edit your details. This is where you add all of the text you want to appear on your invitations. Plus, you can add in a return address that will be printed on the envelope flap. After that, you can upload your guest address file after downloading and personalizing it with your guests’ details. For formal invitations, you will also want to opt into adding an insert card, reply card and reply envelope.
Review your order and checkout. After purchasing, your dedicated designer will get to work. You should receive a digital .pdf proof within three business days.
Submit your approval and wait for the mail. Once you have committed to your design, your wedding invitation set will be put into production and should get shipped to your home 12 to 15 business days later.
These are the key components to wedding invitation sets, and they definitely take some time to complete. Sit down with your partner and go over your ideas, preferences and assess which templates stick out most to both of you.
About two to three weeks before your wedding day, you want all of your guests to have sent through their RSVPs. Once you have reviewed the “yes” and “no” responses, you can move on to handling the seating arrangements and other necessary reception tasks. But how exactly do you want to ask guests to RSVP? Based on your wedding invitation set selections and general preferences, these are the three main options available to you and your partner:
Create a mostly digital wedding invitation set with RSVP wedding website functionality: You can seamlessly connect your invitation to the RSVP section of your wedding website for an even more detailed, easy-to-understand experience. Wedding website RSVPs can ask not only “yes” or “no,” but other questions pertaining to the group size, dietary preferences and restrictions and more. This is completely customizable at Bliss & Bone, and you can review an example of it.
Create a printed and digital wedding invitation set with RSVP connected to your website: You can get the best of both worlds by creating a printed wedding invitation set and featuring the URL of your wedding website. From there, guests can visit your site and go over the detailed questions you have put into your intake form. Guests might be confused on how to RSVP, so try and make it as clear as possible on your invitation.
Create a printed wedding invitation set with RSVP cards sent through the mail: If you want more traditional, classic wedding invitation sets, print everything for your guests. While this will increase your overall costs, it is helpful to have everything in one place. Plus, guests can keep your invite on their fridge or stow it away as a keepsake. Just make sure you add an insert card and envelope to your order as you design your printed wedding invitation set. It is also best to pre-stamp the envelope and add your return address so guests can send it back to you ASAP.
As you consider your options, think about your guests as well. If most of your guests are tech-savvy and you trust that they can follow online directions, an RSVP wedding website could be best for you and your event. Or, if you want a more traditional, hands-on approach, printed wedding invitation sets might be your answer
By now, you have learned how to design and build out any of our wedding invitation sets. There is so much to explore at Bliss & Bone, and there are even more ways to craft your own completely original wedding invitation set. If you ever have questions or concerns for us, do not hesitate to contact us online or shoot us an email at hello@blissandbone.com. We are thrilled and eager to help you create the most beautiful wedding invitation set imaginable.